Heliosphere Quick Start
These instructions illustrate the process of running a heliosphere
simulation to test your build of the kaiju code.
Before you begin
Source (not run) the environment setup scripts for the kaiju and
kaipy software. For example:
source /path/to/your/kaiju-clone/scripts/setupEnvironment.sh
source /path/to/your/kaipy/scripts/setupEnvironment.sh
Running a heliosphere simulation
The gamhelio_mpi.x software needs several files in order to run. The
detailed steps for creating these files have been combined into a script
called makeitso-gamhelio.py. The script is provided in the kaiju code
repository. More information on makeitso-gamhelio.py is available
here.
You can see the options supported my makeitso-gamhelio.py by
running it with the --help or -h command-line option.
makeitso-gamhelio.py --help
usage: makeitso-gamhelio.py [-h] [--clobber] [--debug] [--mode MODE] [--options_path OPTIONS_PATH] [--verbose]

Script to prepare a GAMERA heliosphere run.

optional arguments:
  -h, --help            show this help message and exit
  --clobber             Overwrite existing options file (default: False).
  --debug, -d           Print debugging output (default: False).
  --mode MODE           User mode (BASIC|INTERMEDIATE|EXPERT) (default: BASIC).
  --options_path OPTIONS_PATH, -o OPTIONS_PATH
                          Path to JSON file of options (default: None)
  --verbose, -v         Print verbose output (default: False).
For this example, we will run the code on derecho, and use the default
BASIC mode, which requires the minimum amount of input from the user. At
each prompt, you can either type in a value, or hit the Return key to
accept the default value (shown in square brackets at the end of the prompt).
Important
The gamhelio_mpi.x software requires a FITS file containing
the output from the WSA (Wang-Sheeley-Arge) solar wind model, covering the
time period of interest. This file is called wsa.fits in the example
below.
To get started, run makeitso-gamhelio.py with no arguments:
makeitso-gamhelio.py

Name to use for PBS job(s) [helio]:
Path to WSA boundary condition file to use [wsa.fits]:
Start date for simulation (yyyy-mm-ddThh:mm:ss) [2017-07-20T05:22:47]:
Stop date for simulation (yyyy-mm-ddThh:mm:ss) [2017-08-16T12:05:59]:
Do you want to split your job into multiple segments? (Y|y|N|n) [N]:
Name of HPC system (derecho|aitken) [aitken]: derecho
PBS account name [<YOUR_ACCOUNT_HERE>]:
Path to kaiju installation [<YOUR_KAIJUHOME_HERE>]:
Path to kaiju build directory [<YOUR_BUILD_DIRECTORY_HERE>]:
Run directory [.]:
PBS queue name (develop|main) [main]:
Job priority (regular|economy) [economy]:
WARNING: You are responsible for ensuring that the wall time is sufficient to run a segment of your simulation!
Requested wall time for each PBS job segment (HH:MM:SS) [01:00:00]:
Number of radial grid cells [128]:
Number of polar angle grid cells [64]:
Number of azimuthal angle grid cells [128]:


Template creation complete!
After these inputs, the script reads data from the WSA FITS file, converts it
to a format readable by gamhelio_mpi.x and generates the XML input file.
You should now see the following files in your run directory:
ls
helio-00.pbs  helio-00.xml  heliogrid.h5  helio.json  helio_pbs.sh  innerbc.h5  wsa2gamera.ini  wsa2gamera.log  wsa.fits
Finally, submit the model run using the script generated by
makeitso-gamhelio.py. You will see the resulting PBS job ID (your job ID
will be different):
bash helio_pbs.sh
8535866.desched1
Once the job is started in the queue, it should take about 15 minutes to run
(on derecho). When complete, you will see many new HDF5 files in your
run directory, along with PBS housekeeping files and logs. The most important
files are (repeated upper-case letters in the names represent integer
strings):
helio_LLLLL_MMMMM_NNNNN_IIIII_JJJJJ_KKKKK.gam.h5These files contain the core MHD variables from the simulation, computed by the
gamhelio_mpi.xportion of thekaijusoftware. The stringsLLLLL,MMMMM, andNNNNNcontain the number of subsections of theX,Y, andZdimensions used to divide the domain among MPI ranks. The stringsIIIII,JJJJJ, andKKKKKrepresent the MPI rank index along each dimension.helio_*.gam.Res.RRRRR.h5These are checkpoint files generated during the simulation which can be used as restart points for future simulations.
Visualizing the results
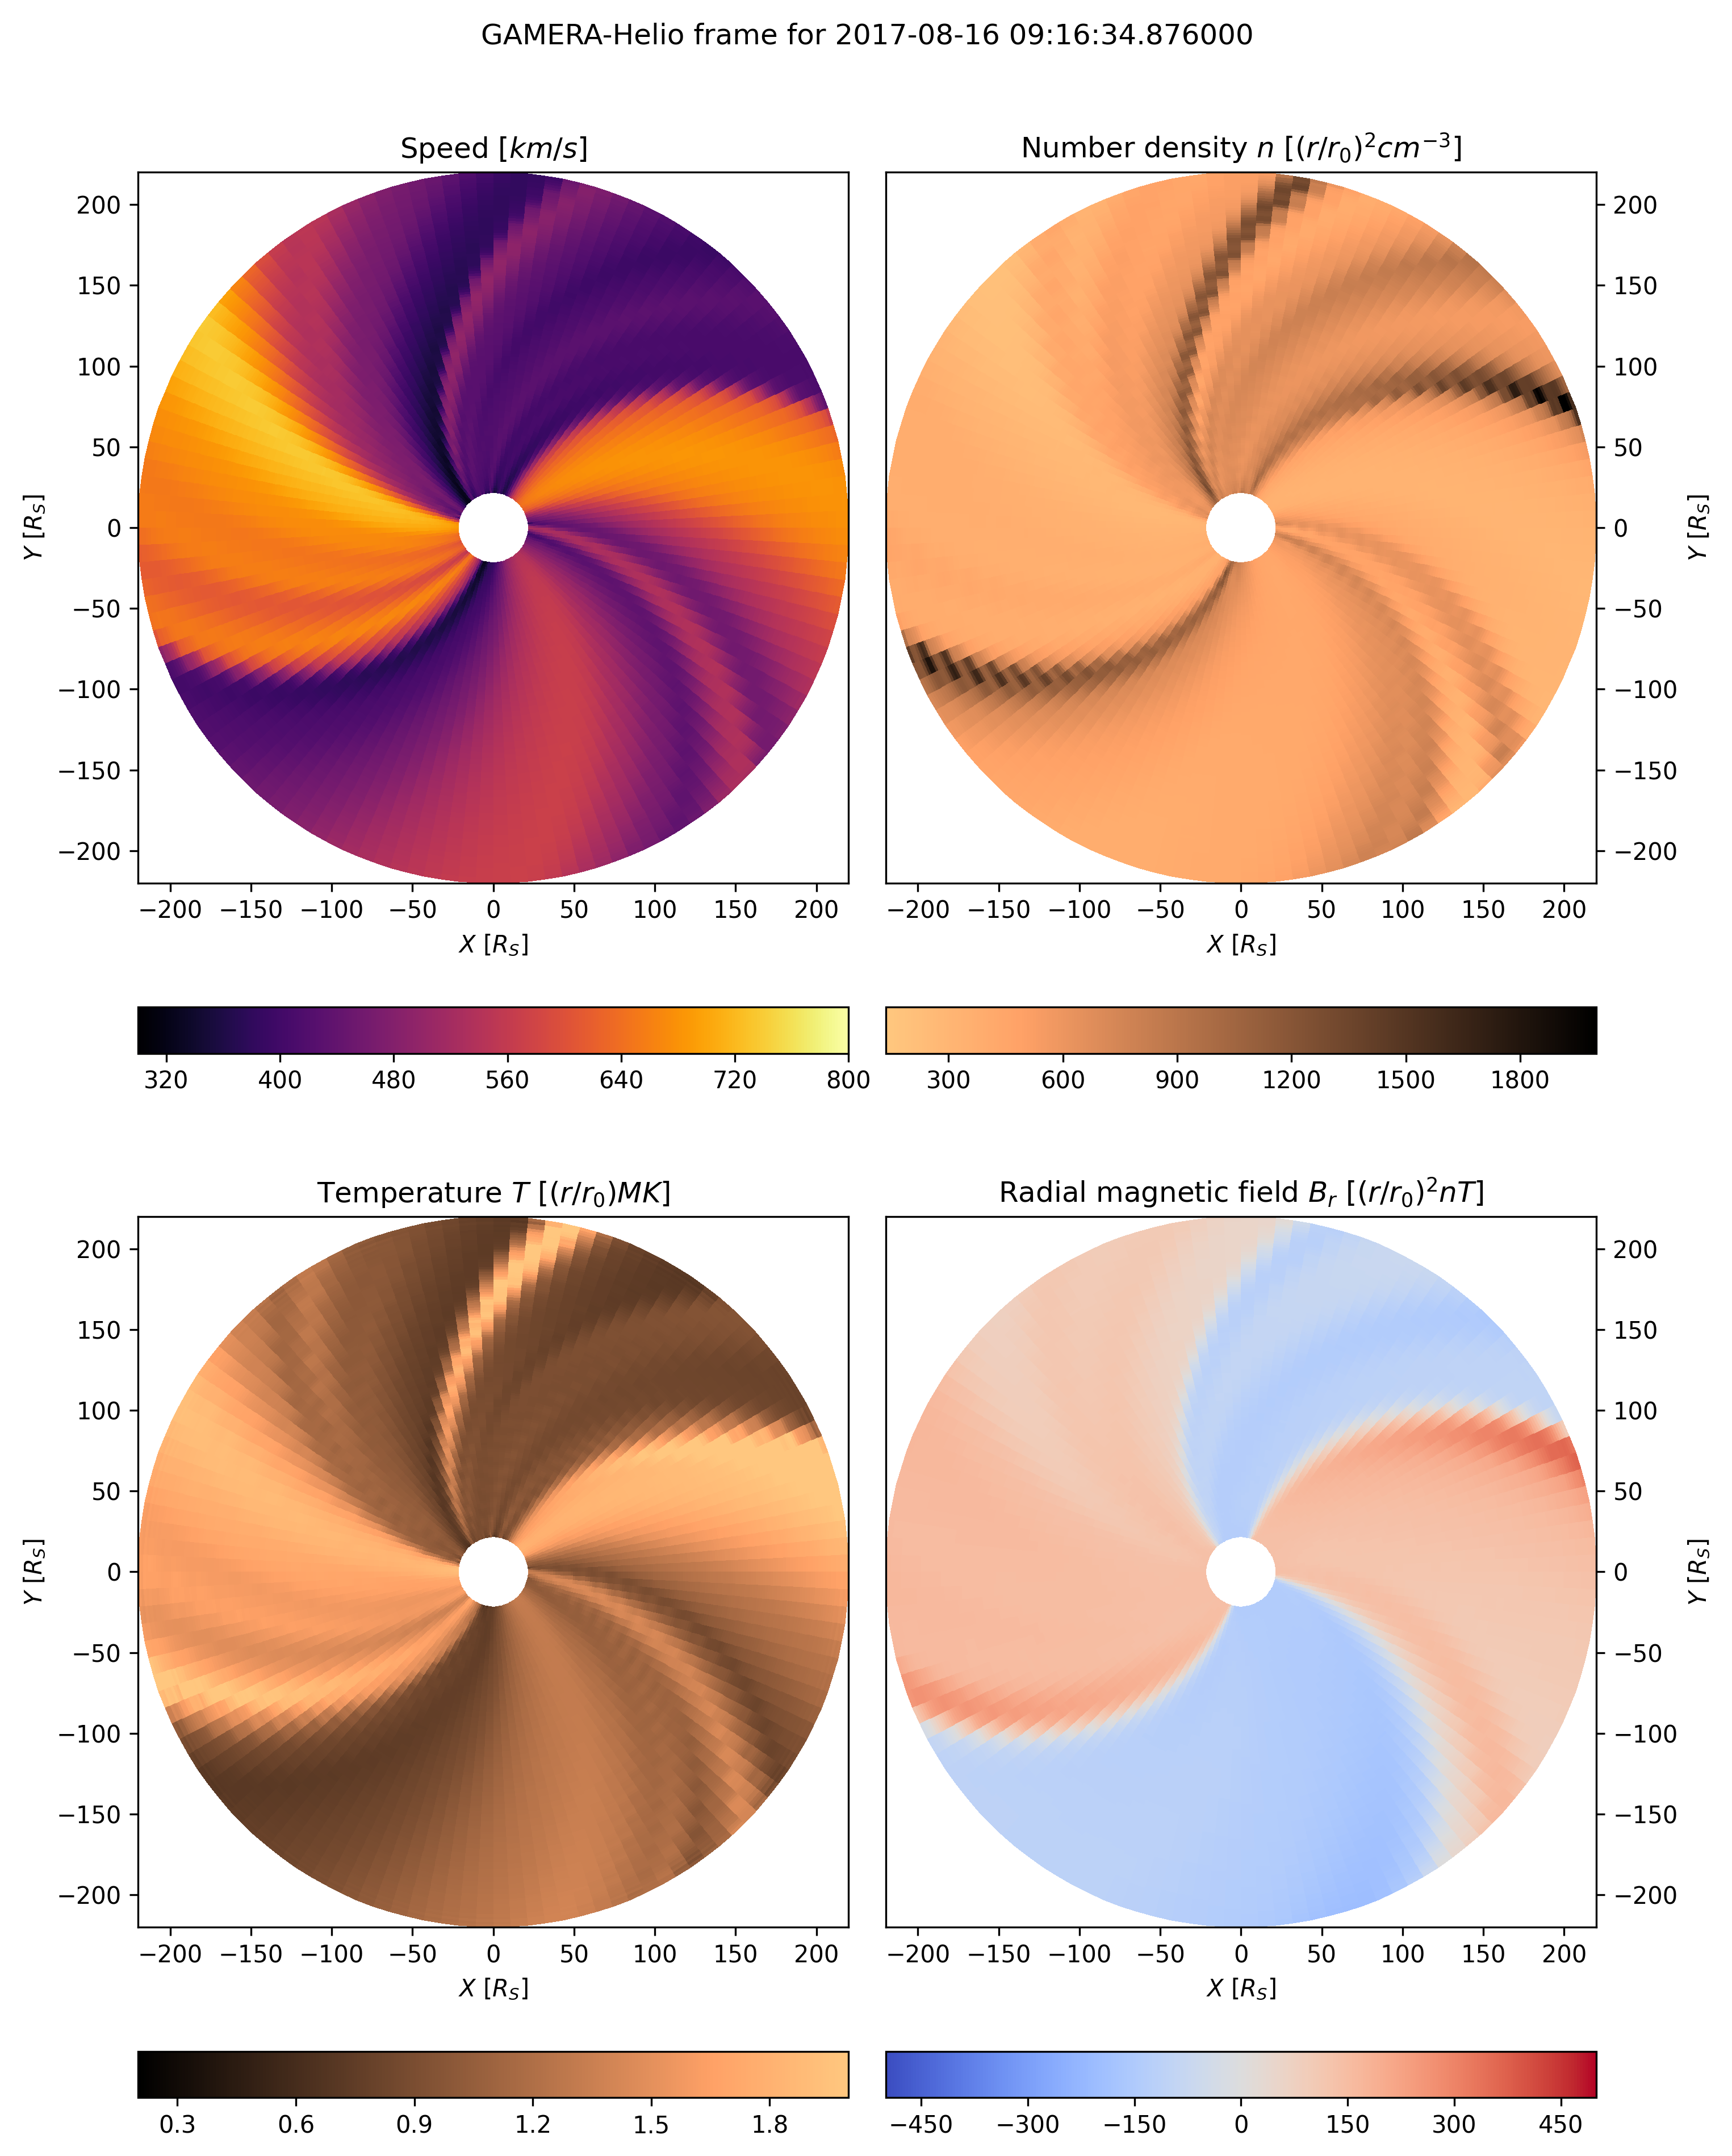
Now perform a quick visualization of the results at time step 69 from your
simulation using the heliopic.py script, provided in the kaipy package.
heliopic.py -id helio -v --nlist 69
This script will create a file called qkpic_helio_pic1_n1.png, which
should look similar to this: